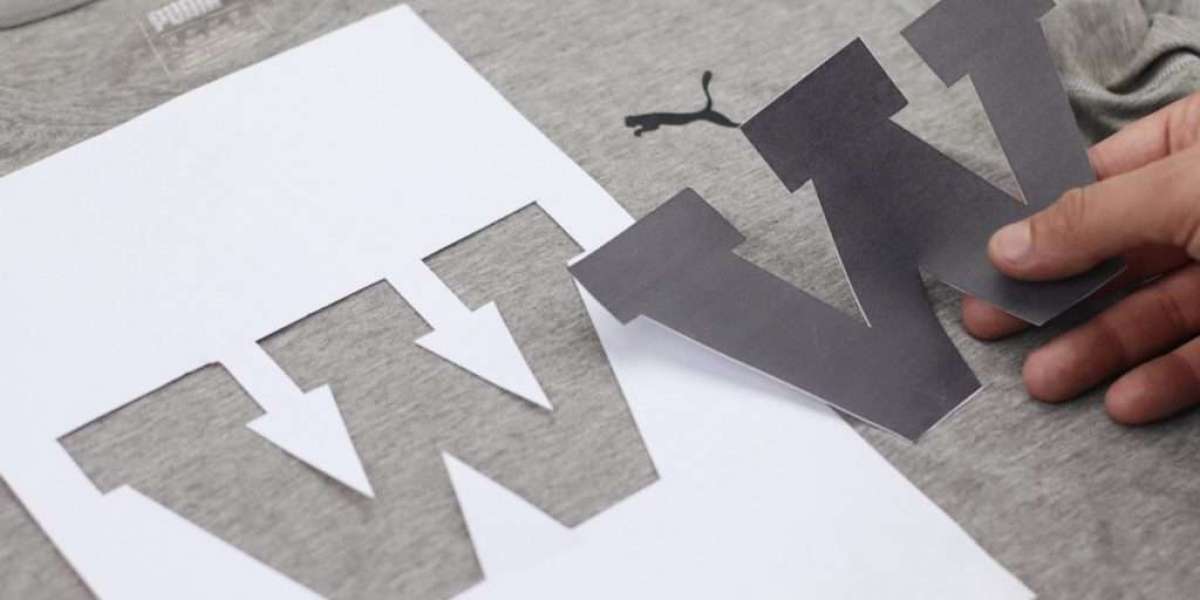
Create Custom Stencils is a fun, cost-effective way to add a personalized touch to your home décor, crafts, or art projects. Whether you’re designing stencils for wall art, furniture, or even floors, custom stencils allow you to bring your unique vision to life. With the right techniques and tools, you can create professional-looking stencils at home that can be reused time and time again.
In this guide, we’ll walk you through some essential tips and tricks for Create Custom Stencils, from choosing the right materials to designing intricate patterns, and ensuring your stencils are both durable and easy to use.
Choose the Right Material for Your Stencil
The material you use for your Create Custom Stencils is one of the most important decisions, as it affects both the ease of use and the longevity of your stencil. Here are some of the most common stencil materials, each with its advantages:
- Mylar Plastic: This is one of the most popular stencil materials because it’s durable, flexible, and reusable. Mylar is available in various thicknesses, typically ranging from 3 to 10 mils, with thicker materials offering more durability.
- Stencil Film: Similar to Mylar but often a little thinner, stencil film is flexible and great for creating detailed designs. It’s an excellent option for intricate patterns or smaller-scale projects.
- Cardstock or Paper: If you’re just starting or working on a one-time project, cardstock or heavyweight paper can be a quick and inexpensive option. However, paper stencils are more likely to tear or warp with repeated use, so they're best for temporary stenciling.
- Acetate Sheets: These are clear and lightweight, making them easy to work with. Acetate sheets are great for projects where you want to see through the stencil for alignment purposes, but they may not be as durable as Mylar for extensive use.
- Wood or Chipboard: For stencils that need to be more rigid and robust, thin wood or chipboard can work well. They can handle repeated use and are a good option for larger stencils, such as for wall art or furniture.
Create a Design
Before you start cutting out your stencil, you need to decide on the design. Custom stencils can be as simple or as intricate as you like, but here are some tips to help you with the design process:
- Use Graphic Design Software: For precise, detailed designs, use graphic design software like Adobe Illustrator, Canva, or Inkscape. These programs allow you to create vector-based designs that can easily be resized, altered and cleaned up. They also provide tools to help with symmetry and alignment.
- Choose Simple, Bold Designs: If you’re just starting with stenciling, keep the design simple. Bold, clean lines are easier to cut and will provide better results. Intricate designs with too many fine details can be difficult to cut and may result in a blurry or imperfect stencil.
- Consider Negative Space: Remember that stencils are essentially cut-out shapes, so think about how the design will look in terms of both the image and the space around it. Pay attention to the negative space (the areas that aren’t cut out) and ensure there are no areas that will break away or cause the stencil to become flimsy.
- Scaling the Design: If your design is a piece of clipart or an image you’ve found online, ensure it’s the right size for your project. You can resize the design using software, but be mindful of how resizing may impact details. You may need to adjust the design or clean up the edges if it gets too small or too large.
Transfer Your Design
Once you’ve created or selected a design, you’ll need to transfer it to your stencil material. Here are several ways to do that:
- Print and Trace: One of the simplest ways to transfer a design is to print it out on paper and trace it onto your stencil material. Place the printed design under a transparent stencil material (like acetate or Mylar) and use a fine-point pen or marker to trace the outlines.
- Projector Method: If you have a digital version of your design, you can project it onto your stencil material using a projector. This method works well for larger designs, as it allows you to trace directly onto the material without the need to resize it.
- Carbon Paper: For a more traditional method, you can use carbon paper to trace your design onto your stencil material. Lay the carbon paper between your design and the stencil material, then trace the design with a pen or pencil to transfer the image.
- Direct Drawing: If you're confident in your drawing skills, you can directly sketch the design onto the stencil material using a pencil. This is a good option if you want a more freehand, organic design.
Cutting Out the Design
Once you’ve transferred your design, it’s time to cut it out. Create Custom Stencils can be a bit tricky, but with the right tools and techniques, you can achieve crisp, clean lines. Here are some tips to help:
- Use a Craft Knife or X-Acto Knife: For the cleanest cuts, a sharp craft knife or X-Acto knife is essential. These knives provide precision, especially for intricate designs. Make sure to replace the blade regularly to avoid jagged cuts.
- Use a Self-Healing Mat: Protect your work surface by using a self-healing cutting mat. This will also keep your blade from dulling too quickly and help you avoid cutting through your stencil material unintentionally.
- Cut in Layers: If your design is intricate, take your time and cut it slowly, layer by layer. Start with the larger areas and then work your way toward the smaller, more detailed sections.
- Create Bridges: For more complex designs with cut-outs that could float, add small bridges or supports that connect different parts of the design. These bridges help maintain the integrity of the stencil and prevent it from breaking apart.
- Test the Stencil: Before you use your stencil on your project, test it by spraying it with some light paint or using a pencil to ensure that the cuts are clean and the stencil holds together.
Consider Stencil Reusability
To make your custom stencil last, keep these tips in mind:
- Reinforce with Tape or Glue: If you want your stencil to last longer, reinforce any weak points or edges with a bit of painter’s tape. This is especially useful for larger stencils that might have delicate areas.
- Storage: Store your stencils flat and away from direct sunlight or heat to prevent them from warping. If using Mylar or acetate, it’s best to keep them in a protective sheet or folder.
- Clean After Use: After stenciling, clean your stencil immediately. Use a damp cloth to wipe off any paint, and avoid soaking the material, as some stencil materials may warp if exposed to excessive moisture.
Test and Adjust Your Stencil
Before using your Go stencil on your final project, it’s always a good idea to do a test run on a scrap piece of material. This allows you to check for any imperfections or areas where the stencil may need adjustment. If you notice any issues, such as gaps, smudging, or misalignment, make the necessary changes before you start your project.
Conclusion
Create Custom Stencils allows you to personalize your craft and home décor projects in a fun and affordable way. By following these tips and tricks, you can design, cut, and use stencils that are precise, durable, and professional-looking. With practice, you’ll be able to experiment with more complex designs, refine your technique, and unlock even more creative possibilities.


